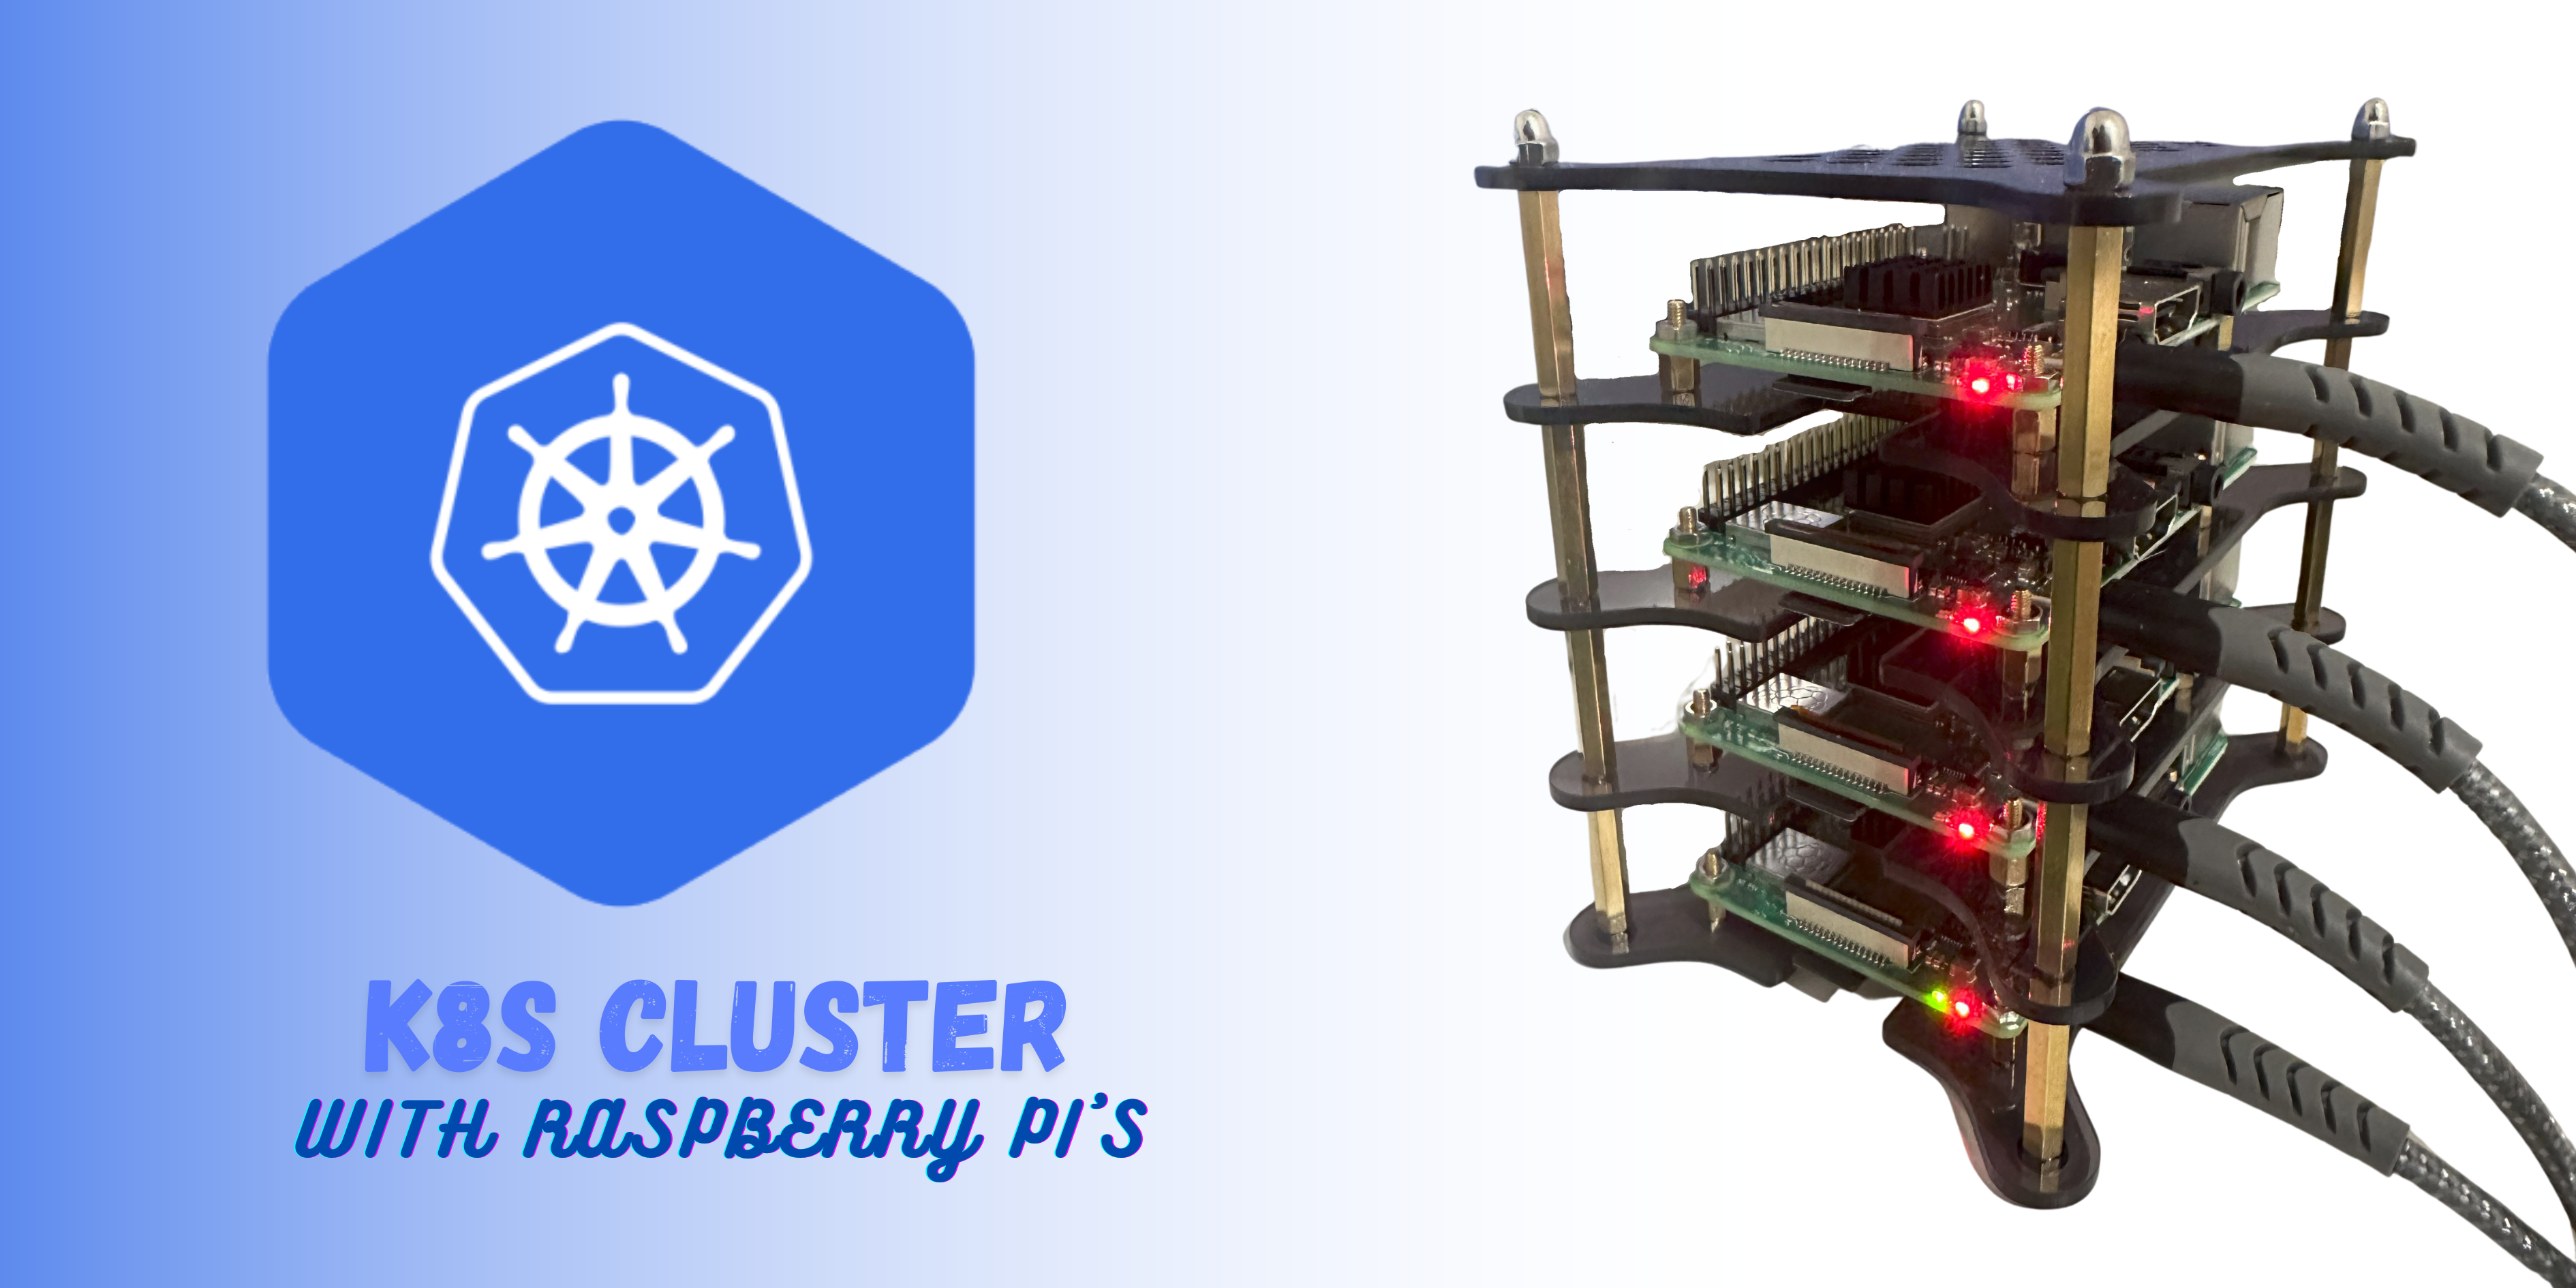
Creating a On Premise Kubernetes cluster using Raspberry PIs
Creating a Kubernetes cluster on-premise can be a rewarding project for tech enthusiasts and professionals looking to gain hands-on experience with container orchestration.
In this blog post, we will walk through the process of setting up a Kubernetes cluster using four Raspberry Pis. From the initial preparation of the Raspberry Pis, including choosing a proper cluster mount and power supply, to installing a headless OS and configuring the system, every step will be covered in detail.
We will also delve into using an Ansible playbook to streamline the configuration process, making it easier to manage and replicate. Whether you’re a hobbyist or a seasoned developer, this guide will equip you with the knowledge and tools to build your own Kubernetes cluster at home.
Physical Hardware and Components Needed
In this section, we will discuss the hardware components required and the steps to set up the physical cluster for our Kubernetes project.
For this project, I repurposed four Raspberry Pi 3+ B boards. While boards with more than 1GB of memory are recommended, especially for the control plane node, they are not essential. I am using Raspberry Pi boards with 1GB of memory for this setup.
To house the Raspberry Pis, I purchased the GeeekPi 6-Layers Cluster Case . This case is ideal for neatly stacking and organizing multiple Raspberry Pis, providing both a compact and aesthetically pleasing solution.
For powering the cluster, I opted for a USB power supply adapter with multiple ports. This ensures that I have a dedicated power source for the entire cluster. If you don’t already have them, you will also need four micro-USB charger cables to connect each Raspberry Pi to the power supply.
Each Raspberry Pi requires storage, so I am using four SanDisk 32GB A1 class SD cards. These cards provide sufficient space for the operating system and any applications we will run on the cluster.
Once you have all the components, follow these steps to set up the physical cluster:
- Assemble the Cluster Case: Follow the instructions provided with the GeeekPi cluster case to assemble it. This typically involves stacking the layers and securing them with screws.
- Mount the Raspberry Pis: Insert each Raspberry Pi into its designated slot in the cluster case. Ensure they are securely placed and the ports are accessible.
- Connect the Power Supply: Attach the micro-USB charger cables to each Raspberry Pi and connect them to the USB power supply adapter. Plug the adapter into a power source to power up the cluster.
- Insert the SD Cards: Insert the 32GB SanDisk SD cards into the SD card slots of each Raspberry Pi.
With the physical setup complete, your Raspberry Pi cluster is ready for the next steps, where we will install a headless OS and configure the cluster.
Installing the Operating System and Configuring Access
In this section, we will cover the installation of the operating system on the Raspberry Pis and how to configure them for WiFi access and SSH connectivity.
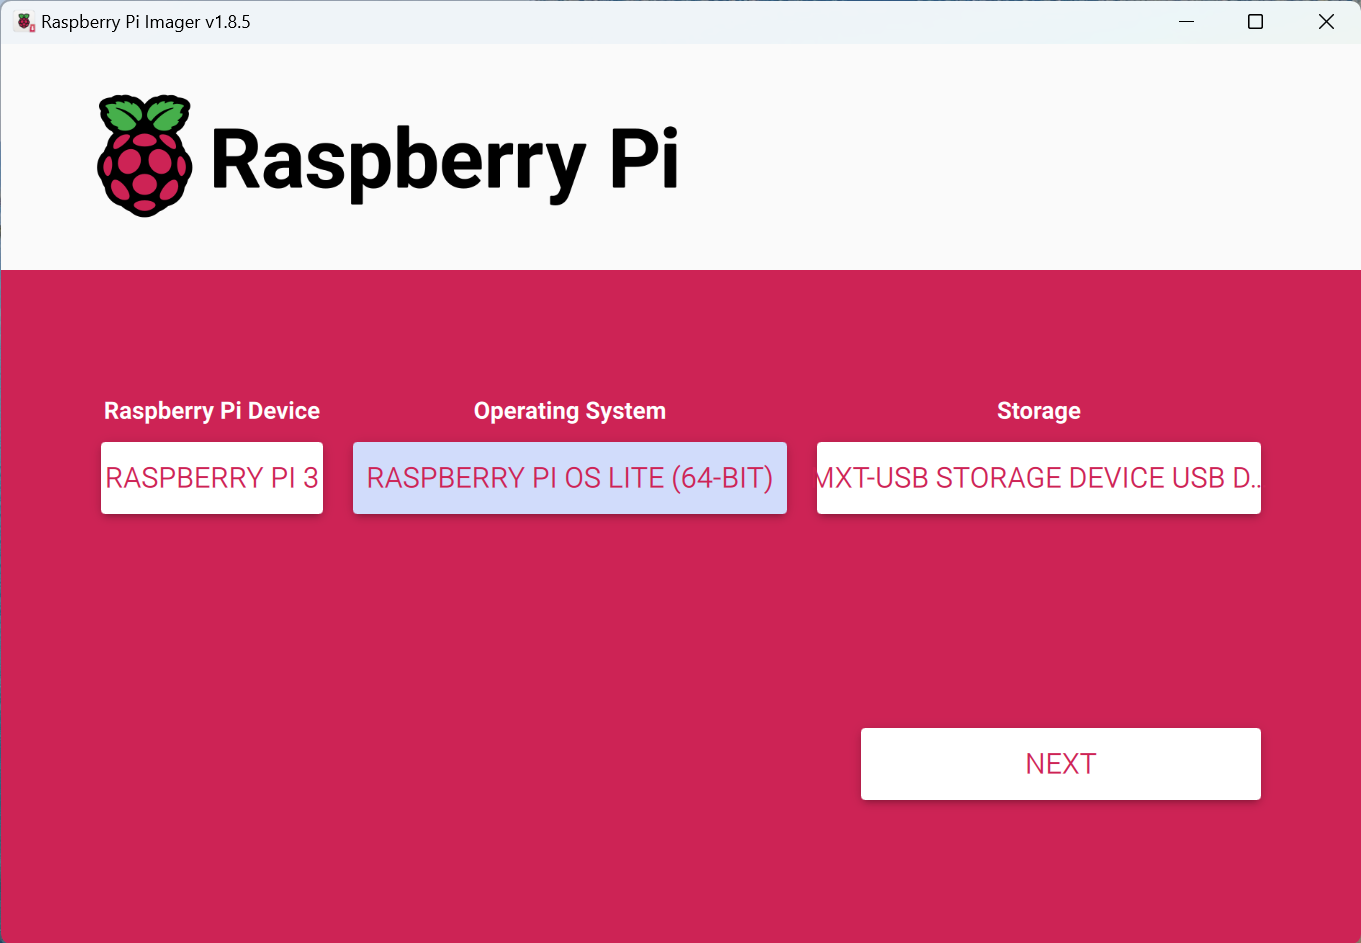
For this project, I chose the Raspberry Pi OS Lite 64-bit version, which is well-suited for our needs due to its lightweight nature and robust performance. Here’s a step-by-step guide on how to get the operating system up and running on your Raspberry Pis:
Download Raspberry Pi Imager
Start by downloading and installing the Raspberry Pi Imager tool on your computer. This tool simplifies the process of flashing the OS onto the SD cards.
Prepare the SD Cards - Choose lite (headless varient) OS using Imager tool
- Insert one of the SanDisk 32GB SD cards into your computer’s card reader.
- Open the Raspberry Pi Imager tool.
- Select the Raspberry Pi OS Lite 64-bit version from the list of available operating systems.
- Choose the SD card you inserted as the storage device.
Customize OS Settings for network connectivity
Click next to go to overiew page. Before flashing the OS, click on the “Settings” icon to customize the OS settings. This will enable us to set hostname, select wifi SSID, and configure SSH access.
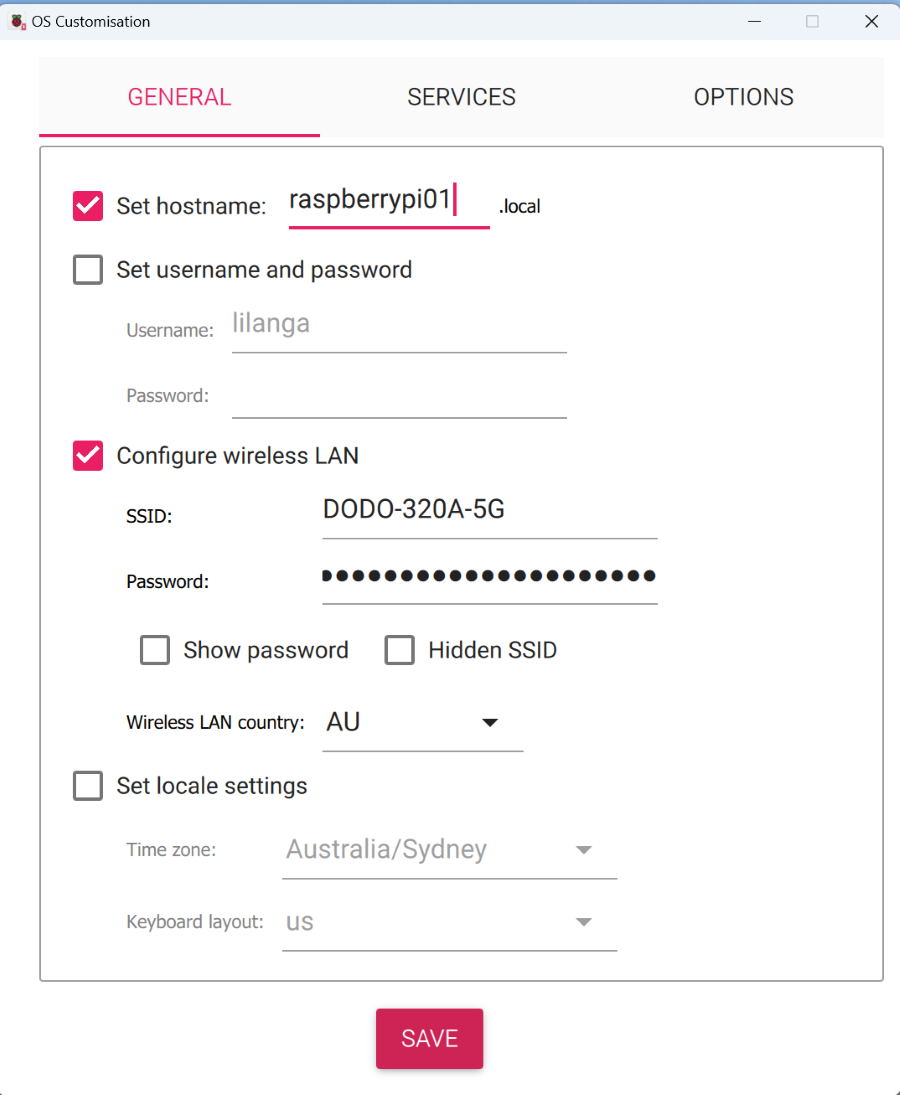
- Assign a unique hostname to each Raspberry Pi (e.g., rpi-node-1, rpi-node-2, etc.). This helps in identifying each device on your network.
- Configure your wireless LAN settings by entering your WiFi SSID and password. This ensures that each Raspberry Pi will connect to your wireless network upon boot.
- Goto Services tab and click on Enable SSH to allow remote connections.
- Add your host PC’s SSH public key. This allows you to SSH into the Raspberry Pis without needing a password each time.
Flash the SD Cards
Once you have customized the settings, proceed to flash the SD card with the OS. Repeat the process for the remaining SD cards, ensuring each card has a unique hostname.
Insert SD Cards and Power Up
Insert the prepared SD cards into the Raspberry Pis. Connect the Raspberry Pis to the USB power supply adapter and power them up. They should boot and connect to the WiFi network you configured.
Find IP Addresses
After the Raspberry Pis have booted, access your router’s admin page to find the IP addresses assigned to each device. Look for the hostnames you set during the OS customization. Note down the IP addresses for each Raspberry Pi.
Assign static IP addresses to devices
To ensure the IP addresses of your Raspberry Pis remain consistent, configure your router’s DHCP Reservation settings. Assign a designated IP address to each Raspberry Pi based on its MAC address or device host name. This will help prevent IP address changes upon reboots, making it easier to configure your host machine’s SSH hosts file and Ansible inventory in future steps. 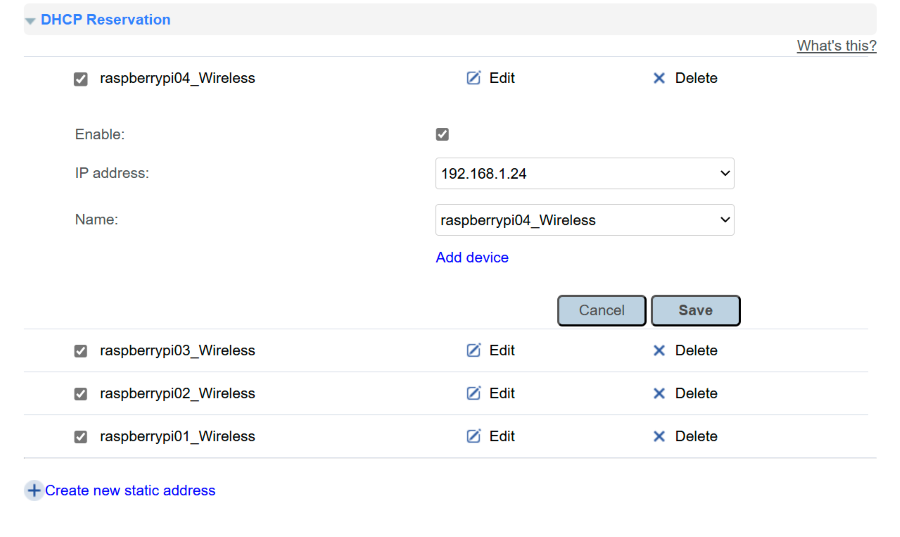
SSH into Raspberry Pis
Open a terminal on your host PC. Use the ssh command to connect to each Raspberry Pi. For example:
1
ssh pi@<IP_ADDRESS>
You should be able to connect to each device without any issues, thanks to the SSH key you added earlier.
Since we have reserved IP addresses for all Raspberry PI devices, we can update our ~\ssh.config file and add our host entries for Raspberry PI devices.
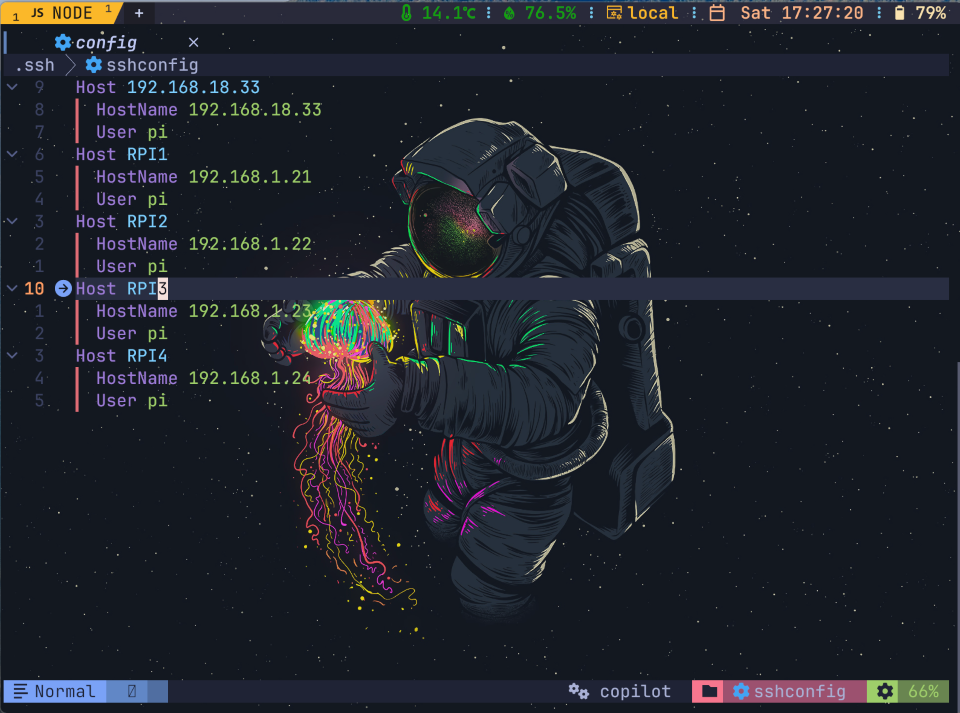
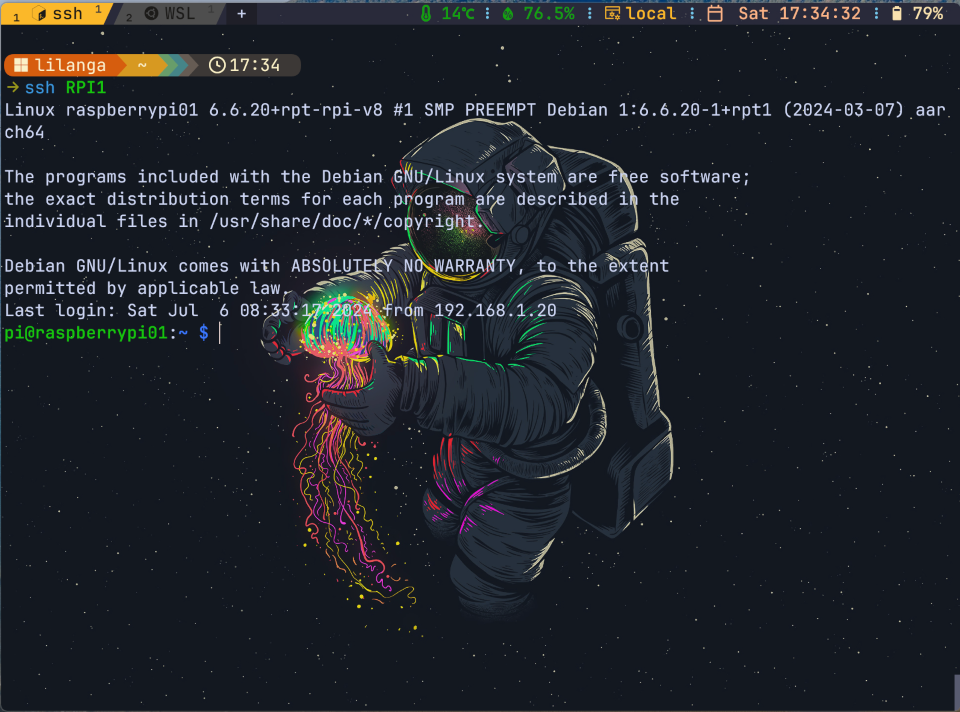
When we have host entries in place, we can ssh easily to our devices. Use the host entry given in the ssh config file to SSH into that node.
ex: ssh RPI1
By following these steps, you’ll have a set of Raspberry Pis with the Raspberry Pi OS Lite 64-bit version installed, connected to your WiFi network, and ready for remote access via SSH. This setup lays the foundation for configuring and deploying your Kubernetes cluster in the next steps.
Configuring Raspberry Pi Devices for Kubernetes
Now that our Raspberry Pi devices are up and running with a headless Raspberry Pi OS and connected to our network, the next step is to configure them to run container runtime and prepare them for the Kubernetes cluster. Instead of manually SSHing into each Raspberry Pi and repeating the same steps, we will use Ansible, a powerful task automation tool, to streamline this process.
Setting Up Ansible on the Host Machine
Since I am using a Windows machine as the host, I will utilize the Windows Subsystem for Linux (WSL) to install Ansible and configure the Raspberry Pi devices from WSL.
On Ubuntu WSL shell, lets use apt to update packages and install ansible
1
2
sudo apt update
sudo apt install ansible
Remember to update ssh config file like we discussed earlier.
1
vim ~/.ssh/config
To SSH from WSL, we need to add SSH public key of WSL to each Raspberry PI’s .ssh/authorized_keys file. I copied public key of WSL and used following command from Host windows OS to update Raspberry PI devices.
1
2
3
4
echo "echo 'SSH-RSA-KEY-GOES-HERE' >> ~/.ssh/authorized_keys" | ssh RPI1
echo "echo 'SSH-RSA-KEY-GOES-HERE' >> ~/.ssh/authorized_keys" | ssh RPI2
echo "echo 'SSH-RSA-KEY-GOES-HERE' >> ~/.ssh/authorized_keys" | ssh RPI3
echo "echo 'SSH-RSA-KEY-GOES-HERE' >> ~/.ssh/authorized_keys" | ssh RPI4
Now we can SSH to our Raspberry PI devices from WSL.
Setting up Ansible Inventory file
Lets create an inventory file to list the Raspberry Pi nodes. This file tells Ansible which devices to target for configuration. You can create a directory for your ansible project and create inventory for that. But here I am using the global ansible inventory file at /etc/ansible/hosts and update it.
1
2
3
4
5
6
7
8
9
10
11
12
13
14
15
16
17
18
all:
  vars:
    ansible_user: pi
  children:
    rpi_all:
      hosts:
        192.168.1.21:
        192.168.1.22:
        192.168.1.23:
        192.168.1.24:
    k8s_master:
      hosts:
        192.168.1.21:
    k8s_workers:
      hosts:
        192.168.1.22:
        192.168.1.23:
        192.168.1.24:
Now we configured ansible to access our Raspberry Devices. lets write our first Ansible playbook to configure OS.
Configure Raspberry PI OS for Kubernetes with Ansible
It’s time to prepare them for running Kubernetes. Instead of manually SSHing into each Raspberry Pi and repeating the same configuration steps, we will leverage Ansible to streamline and automate the configuration process.
This is our Ansible playbook for OS configuration tasks. Lets save the file as configure-os.yaml
1
2
3
4
5
6
7
8
9
10
11
12
13
14
15
16
17
18
19
20
21
22
23
24
25
26
27
28
29
30
31
32
33
34
35
36
37
38
39
40
41
42
43
44
45
46
47
48
49
50
51
52
53
54
55
56
57
58
59
60
61
62
63
64
65
66
67
68
69
70
71
72
73
74
75
76
77
78
79
80
81
82
83
84
85
86
87
88
89
90
91
92
93
94
95
96
97
98
99
100
101
102
103
104
105
106
107
108
109
110
111
112
113
114
115
116
117
118
119
120
121
122
123
124
125
126
127
128
129
130
131
132
133
134
135
136
137
138
139
140
141
142
143
144
145
146
147
148
149
150
151
152
153
154
155
156
157
158
159
160
161
162
163
164
165
166
167
168
169
170
171
172
173
174
175
176
177
178
179
180
181
182
183
184
185
186
187
188
189
190
191
192
193
194
195
196
197
198
199
200
201
202
203
---
- name: Configure raspberry pi lite os to run k8s
  hosts: rpi_all
  become: yes
  gather_facts: no
  tasks:
    - name: Execute apt update and upgrade distro
      ansible.builtin.apt:
        update_cache: yes
        upgrade: dist
        cache_valid_time: 3600
        autoclean: yes
        autoremove: yes

    - name: Check for reboot required flag
      register: reboot_required_flag
      stat:
        path: /var/run/reboot-required
        get_md5: no

    - name: Reboot system if flag file exists
      ansible.builtin.reboot:
        msg: "Rebooting by ansible due to pending updates."
        connect_timeout: 5
        reboot_timeout: 300
        pre_reboot_delay: 0
        post_reboot_delay: 30
        test_command: uptime
      when: reboot_required_flag.stat.exists

    - name: Install vim for editing files
      ansible.builtin.apt:
        pkg:
          - vim

    # recommended swap off and disable swapfile for k8s due to performance issues and predictable memory usage
    - name: load package facts installed on the system
      ansible.builtin.package_facts:
        manager: auto

    - name: Turn off "dphys-swapfile" if installed
      ansible.builtin.command: dphys-swapfile swapoff
      when: "'dphys-swapfile' in ansible_facts.packages"

    - name: Run uninstall on "dphys-swapfile" to disable it
      ansible.builtin.command: dphys-swapfile uninstall
      when: "'dphys-swapfile' in ansible_facts.packages"

    - name: Uninstall "dphys-swapfile" package from the system
      ansible.builtin.apt:
        pkg: dphys-swapfile
        state: absent
        purge: yes
        autoclean: yes
        autoremove: yes
      when: "'dphys-swapfile' in ansible_facts.packages"


    # Configure cgroup for install container runtime

    - name: Configure cgroup in /boot/firmware/cmdline.txt
      ansible.builtin.lineinfile:
        path: /boot/firmware/cmdline.txt
        backrefs: yes
        regexp: '^((?!.*cgroup_enable=cpuset cgroup_enable=memory cgroup_memory=1).*)$'
        line: '\1 cgroup_enable=cpuset cgroup_enable=memory cgroup_memory=1'


    # Install containerd container runtime

    - name: Install containerd container runtime and containernetworking-plugins
      ansible.builtin.apt:
        pkg:
          - containerd
          - containernetworking-plugins

    # Configure containerd to use systemd cgroup driver

    - name: Configure containerd
      ansible.builtin.copy:
        content: |
          version = 2
          [plugins]
            [plugins."io.containerd.grpc.v1.cri"]
              [plugins."io.containerd.grpc.v1.cri".containerd]
                [plugins."io.containerd.grpc.v1.cri".containerd.runtimes]
                  [plugins."io.containerd.grpc.v1.cri".containerd.runtimes.runc]
                    runtime_type = "io.containerd.runc.v2"
                    [plugins."io.containerd.grpc.v1.cri".containerd.runtimes.runc.options]
                      SystemdCgroup = true
        dest: /etc/containerd/config.toml
        backup: yes
        owner: root
        group: root
        mode: '0644'


    # configure iptables to see bridged traffic

    - name: create /etc/modules-load.d/k8s.conf file
      ansible.builtin.copy:
        content: |
          overlay
          br_netfilter
        dest: /etc/modules-load.d/k8s.conf
        backup: yes
        owner: root
        group: root
        mode: '0644'

    - name: configure modprobe overlay
      ansible.builtin.command: modprobe overlay

    - name: configure modprobe br_netfilter
      ansible.builtin.command: modprobe br_netfilter

    - name: Create /etc/sysctl.d/k8s.conf file to configure iptables
      ansible.builtin.copy:
        content: |
          net.bridge.bridge-nf-call-iptables  = 1
          net.bridge.bridge-nf-call-ip6tables = 1
          net.ipv4.ip_forward                 = 1
        dest: /etc/sysctl.d/k8s.conf
        backup: yes
        owner: root
        group: root
        mode: '0644'

    - name: Run sysctl to apply system changes
      ansible.builtin.command: sysctl --system


    # Install cretificates and required packages for kubelet kubeadm kubectl

    - name: Install certificates and required packages https
      ansible.builtin.apt:
        pkg:
          - apt-transport-https
          - ca-certificates
          - curl

    - name: Add public signing key for Kubernetes packages
      ansible.builtin.get_url:
        url: https://pkgs.k8s.io/core:/stable:/v1.30/deb/Release.key
        dest: /etc/apt/keyrings/kubernetes-apt-keyring.asc
        owner: root
        group: root
        mode: '0644'

    - name: Add Kubernetes ppa repository
      ansible.builtin.apt_repository:
        repo: "deb [signed-by=/etc/apt/keyrings/kubernetes-apt-keyring.asc] https://pkgs.k8s.io/core:/stable:/v1.30/deb/ /"
        state: present
        filename: kubernetes
        update_cache: yes

    - name: Install kubelet kubeadm kubectl packages
      ansible.builtin.apt:
        pkg:
          - kubelet
          - kubeadm
          - kubectl

    - name: Hold kubelet package
      dpkg_selections:
        name: kubelet
        selection: hold

    - name: Hold kubeadm package
      dpkg_selections:
        name: kubeadm
        selection: hold

    - name: Hold kubectl package
      dpkg_selections:
        name: kubectl
        selection: hold


    # Download and install Flannel for networking

    - name: Download and install Flannel for arm64 architecture
      ansible.builtin.get_url:
        url: https://github.com/flannel-io/flannel/releases/download/v0.25.4/flanneld-amd64
        dest: /usr/local/bin/flanneld
        owner: root
        group: root
        mode: '0755'

    - name: Create Flannel networks directory
      ansible.builtin.file:
        path: /var/lib/k8s/flannel/networks
        state: directory
        recurse: yes
        owner: root
        group: root
        mode: '0755'


    # Reboot system

    - name: reboot
      reboot:
Following are key tasks we are doing with this ansible playbook to prepare the environments.
- Modify the
/boot/firmware/cmdline.txtfile to enable cgroups, which are necessary for container runtime. - Install the containerd container runtime and necessary networking plugins.
- Configure containerd to use the systemd cgroup driver.
- Load necessary kernel modules and configure iptables to handle bridged traffic.
- Install certificates and required packages.
- Add the Kubernetes repository and install kubelet, kubeadm, and kubectl.
- Hold these packages to prevent unintended upgrades.
- Download and install Flannel, a network overlay solution for Kubernetes.
- Create necessary directories for Flannel configuration.
- Reboot the system to apply all configurations and changes.
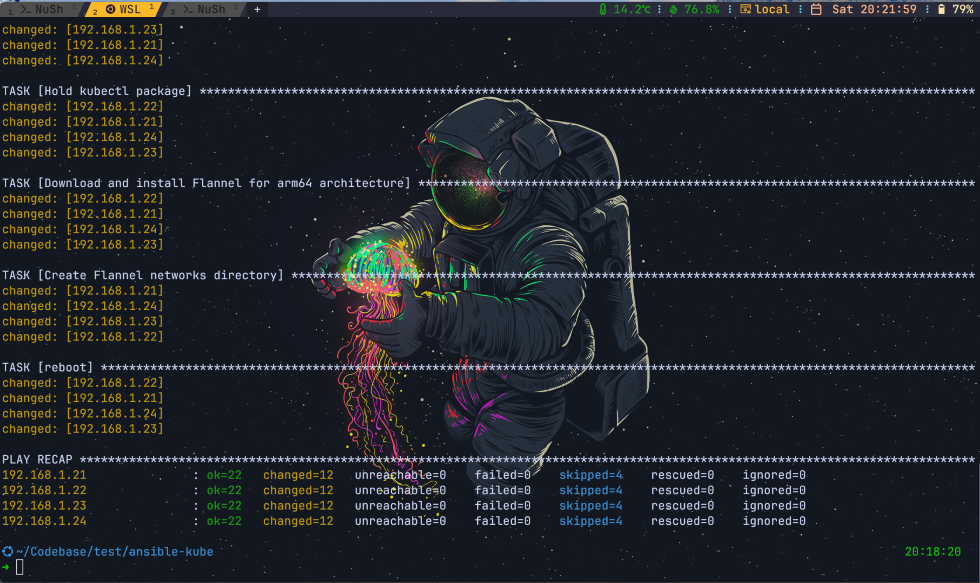
Lets execute this playbook with ansible-playbook ./configure-os.yaml
Configuring the Kubernetes Control Plane
With our Raspberry Pi devices properly configured and ready for Kubernetes, the next critical step is to set up the control plane. The control plane manages the Kubernetes cluster and is responsible for scheduling pods, maintaining cluster state, and handling API requests. In this chapter, we will configure one of the Raspberry Pi devices as the master node, which will serve as the control plane for our Kubernetes cluster.
The Ansible playbook provided below will automate the process of initializing the Kubernetes master node, configuring the kubeconfig file, and applying necessary network configurations. This approach ensures that the setup is consistent and repeatable, reducing the risk of errors and saving time.
Here is the complete Ansible playbook to configure the Kubernetes master node:
1
2
3
4
5
6
7
8
9
10
11
12
13
14
15
16
17
18
19
20
21
22
23
24
25
26
27
28
29
30
31
32
33
34
35
36
37
38
39
40
41
42
43
44
45
46
47
48
49
50
---
- name: Initialize Kubernetes Master and configure kubeconfig
  hosts: k8s_master
  become: yes
  tasks:
    - name: Initialize Kubernetes cluster with pod network CIDR
      shell: kubeadm init --pod-network-cidr=10.244.0.0/16 --ignore-preflight-errors=Mem
      args:
        creates: /etc/kubernetes/admin.conf
      register: kubeadm_init

    - name: Print kubeadm init output for joining workers
      debug:
        var: kubeadm_init.stdout_lines
      when: kubeadm_init.changed

    - name: Create .kube directory
      shell: mkdir -p $HOME/.kube
      when: kubeadm_init.changed

    - name: Copy Kubernetes admin config to .kube/config
      shell: sudo cp -i /etc/kubernetes/admin.conf $HOME/.kube/config
      when: kubeadm_init.changed

    - name: Change ownership of .kube/config
      shell: sudo chown $(id -u):$(id -g) $HOME/.kube/config
      when: kubeadm_init.changed

    - name: Apply Flannel network configuration
      shell: kubectl apply -f https://raw.githubusercontent.com/flannel-io/flannel/v0.25.4/Documentation/kube-flannel.yml
      when: kubeadm_init.changed

    - name: Check kube-proxy config diff
      shell: |
        kubectl get configmap kube-proxy -n kube-system -o yaml | \
        sed -e "s/strictARP: false/strictARP: true/" | \
        kubectl diff -f - -n kube-system
      ignore_errors: yes
      register: kube_proxy_diff
      changed_when: kube_proxy_diff.rc == 2  # Only consider it changed when the return code is 2 (diff detected)

    - name: Apply kube-proxy config changes
      shell: |
        kubectl get configmap kube-proxy -n kube-system -o yaml | \
        sed -e "s/strictARP: false/strictARP: true/" | \
        kubectl apply -f - -n kube-system
      ignore_errors: yes
      changed_when: kube_proxy_diff.rc == 2  # Only apply changes if there is a diff
      when: kube_proxy_diff.rc == 2  # Only apply changes if there is a diff
Key Steps in the Playbook
Initialize the Kubernetes Cluster
Use kubeadm init to initialize the Kubernetes cluster with a specified pod network CIDR.
The
--ignore-preflight-errors=Memflag is used to bypass memory checks, which is necessary for Raspberry Pi devices with limited memory. If you have Raspberry PI devices which have minimum 2GB memory, this flag will not be needed.
Ansible playbook will print important information to the shell which contain the command to attach our worker nodes (remaining Raspberry PIs) to the control plain. Note down the join command printed to console going like sudo kubeadm join 192.168.1.21:6443 --token <TOKEN> --discovery-token-ca-cert-hash <CERT-HASH>
Configure kubeconfig
Create the .kube directory and copy the Kubernetes admin configuration file to the .kube/config path.
Change the ownership of the configuration file to ensure proper access. This will provide acccess to kubectl command. You need to copy this configuration file to your local machine to access cluster with kubectl tool.
Apply Flannel Network Configuration
This step will apply the Flannel CNI (Container Network Interface) configuration to enable networking for the pods.
Configure kube-proxy
Check for differences in the kube-proxy configuration and apply necessary changes to enable strict ARP mode, which is required for certain network setups.
Optional: Install MetalLB
This is optional but helpful since on premise clusters cannot support load-balancers. Use only if you have high power raspberry pi device with 2GB+ memory for the master node.
MetalLB is a load-balancer implementation for bare metal Kubernetes clusters. It provides a way to allocate IP addresses to services.
Refer the github hosted version of above ansible playbook. This step will apply the MetalLB configuration using the kubectl apply command, and configure MetalLB with a ConfigMap that specifies the IP address range to be used for load balancing.
Add Worker Nodes to the Kubernetes Cluster
With the Kubernetes control plane successfully set up on the master node, the next step is to join the remaining Raspberry Pi devices as worker nodes to this cluster.
This will enable the control plane to manage these nodes and distribute workloads across them.
Additionally, we will configure kubectl on our local machine to interact with the cluster.
Steps to Join Worker Nodes
Following steps to add our remaining Raspberry PI devices to control plane as worker nodes.
Copy the Join Command from Ansible playbook output
After initializing the Kubernetes master, a join command is printed to the console. This command includes a token and a CA certificate hash, which are necessary for securely joining the worker nodes to the cluster.
Ex: command goes like this
1
sudo kubeadm join 192.168.1.21:6443 --token <TOKEN> --discovery-token-ca-cert-hash <CERT-HASH>
Run the Join Command on Each Worker Node
We need to SSH into each Raspberry Pi which we are planning to add as a worker node, and execute the copied join command on each of these devices.
This will register them with the control plane and make them part of the Kubernetes cluster.
1
2
ssh RPI2
sudo kubeadm join 192.168.1.21:6443 --token <TOKEN> --discovery-token-ca-cert-hash <CERT-HASH>
Configuring kubectl on Local Host
To manage the Kubernetes cluster from your local machine, we need the admin.conf file from the master node.
This file contains the necessary configuration for kubectl. We can scp to securely copy the admin.conf file from the master node to our local machine.
1
scp pi@RPI1:/etc/kubernetes/admin.conf /path/to/local/directory/admin.conf
Set the KUBECONFIG environment variable to point to the copied admin.conf file. This will configure kubectl to use the correct settings for accessing your cluster.
Use the correct command to set environment variable if you are on windows shells. Following example use bash convention.
1
export KUBECONFIG=/path/to/local/directory/admin.conf
Alternatively, you can copy the admin.conf file to the default location (~/.kube/config) used by kubectl.
1
2
mkdir -p $HOME/.kube
cp /path/to/local/directory/admin.conf $HOME/.kube/config
Verification
Now we can verify access to cluster using kubectl tool. Lets use kubectl to verify that all nodes have successfully joined the cluster.
1
kubectl get nodes
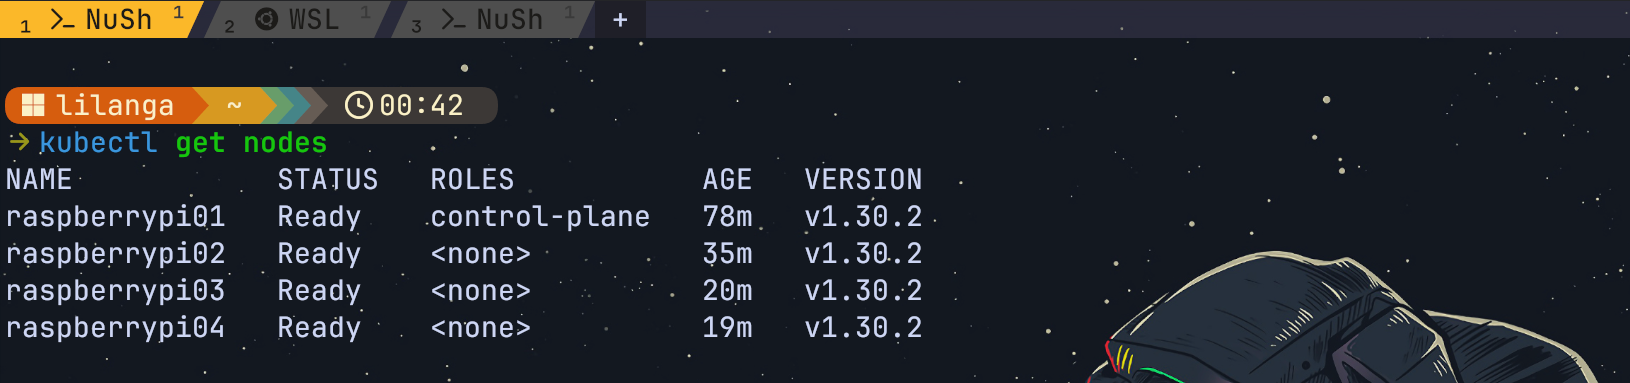
We should be able to see the master node and all the worker nodes listed, with their status showing as “Ready”.
Summary
By following these steps, you should be able to create your own on-premise Kubernetes cluster utilising Raspberry PI devices. Your control plane, hosted on the master node, will now be able to manage and distribute workloads across all the nodes in the cluster. Configuring kubectl on your local machine will allow you to interact with the cluster conveniently, making it easier to deploy and manage applications.
You can find the ansible playbooks and ansible inventory I used for this setup in my github code repository.
This completes the setup of a fully functional Kubernetes cluster using Raspberry Pi devices. You can now start deploying applications and services to your cluster, leveraging the power and flexibility of Kubernetes in an on-premise environment.